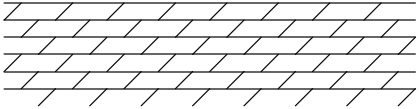
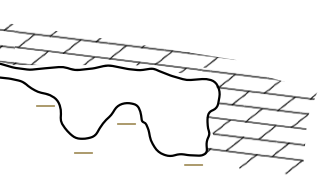
How do I create a clean fill pattern to use in a shape? This is not a standard fill pattern, I want to define my own. I would like to do the following pattern:
and place it in a bezier shape (pen tool) so I could use around/behind other shapes as in:
This works but I have lost crispness going from the pattern to the fill because I had to do a screen shot and use that as the fill.
Is there no way to create a repeating vector pattern?
After discussing with a Canvas (Windows) user, I found a way to use the vector pattern directly. It takes a mix of ‘masks’ to do but allows some flexibility in maneuvering the pattern, too. So far, I am liking the new way better.
Of note, I removed about 40-50 of the fill patterns (which were imported from a PDF export) and file only shrunk 2MB. I will be interested to see when I have 40-50 put back how the file size compares.
@DerekM: I have tried multiple times to get tiling to fit but there seems to be a couple pixels between images, no matter how tight I crop or even clip the image. A setting to control the tiling (space between tiled images with negative options also an option if you wanted overlapping) would be helpful.
Hmm, are we doing this the same way? There are no gaps between the tiles for the image tile fill option. Do you have a PDF of the exact single tile instance or does it have extra info you’re trying to crop out? Here’s 3 examples of a tiled PDF. I’m not seeing any gap between them Tiles.graffle (96.6 KB)
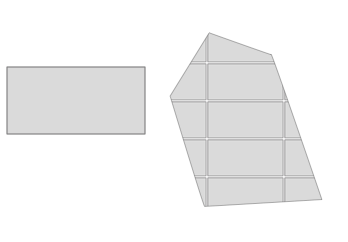
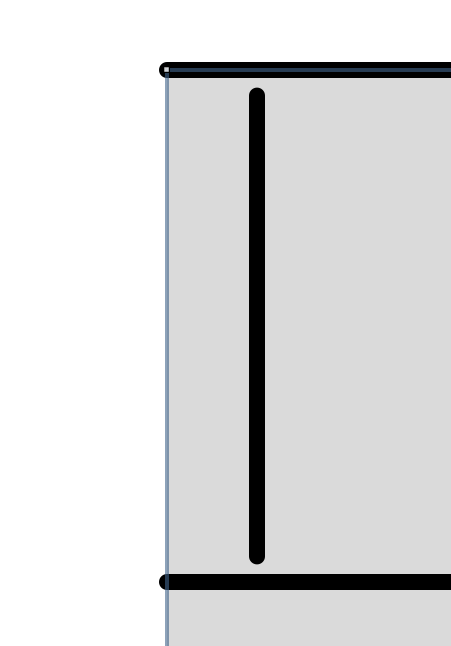
So here is an example of what I have run into. I create a pattern, export as PDF, then create a shape. I set the image as the pattern and select tile. On the left is the ‘pattern’ (just a gray box with a border). On the right is the resulting tiled pattern I get. I have tried with a border and without but still get ‘spacing’ between the image:
Ah, so you’re creating the PDF with OmniGraffle? The issue might be in that step. Try setting a 1x1 pt grid, turn on snapping and make sure the shapes are pixel aligned. If you’re using a stroke, set that to be a inner stroke type. The default stroke type centers itself on the edge of the shape so if you have a 10pt by 10pt square and a 1pt stroke, the whole shape is actually a 10.5pt square. When exported the total image dimensions are a 11pt square so there’s a small amount of blank space on the edges. That’s where this gap is coming from when you tile it. I’m having troubling find the bug on this to check what we’ve already researched about this.
Or if getting everything pixel aligned is really difficult because of the geometry, you can try creating an artboard of the appropriate size that’s pixel aligned and use that to crop the objects.
The first pattern was a “No Stroke” shape.
I am using “Snap to Grid” so I can align the objects correctly.
I am using a default file so units are pixels and 1pt=1px.
Grid is set to 4px major grid spacing with 4 steps in the grid so 1px.
Export settings are PDF, Current Select (single object), Transparent background, no non-printing layers, no margins, size 100%.
Still get a blank space around the tiled item when brought back in as an image.
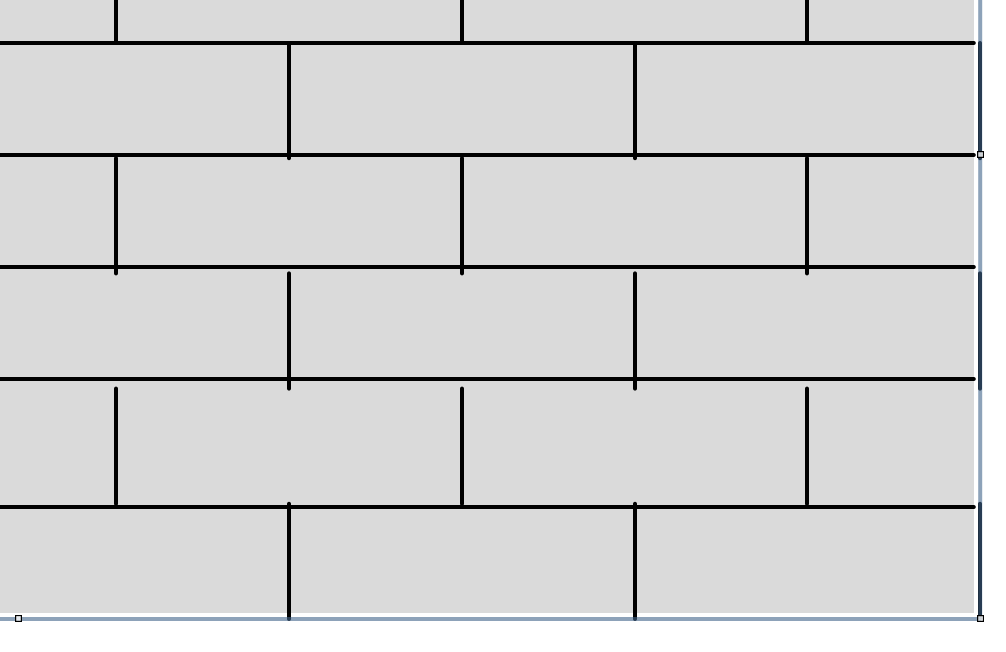
So taking your brick object, if you zoom in in it, you’ll see what’s causing this. Part of the gap is the alignment of the components. Another part of the gap is due the lines. The line strokes have the same issue as an object stroke and you can see parts of it sticking outside the group bounds. Another part is the width of that group being 120.2px.
So using an artboard could help here, but you’ll need to get the right alignment to get the desired crop. You could also try creating these bricks from rectangles instead of lines and using an inner stroke and crop that with an artboard.
ARTBOARDS! Of course! Thank you Thank you Thank you Thank you!
So, now how do I rotate the image within a shape? So if I have a rectangle, I can have a pattern level or I can rotate the pattern so it is tilted 5 degrees (without creating an image for various angles).
Rotating the image separately from the shape isn’t possible. I believe you already emailed about that :) I can’t think of any tricks to avoid having to make individual images.
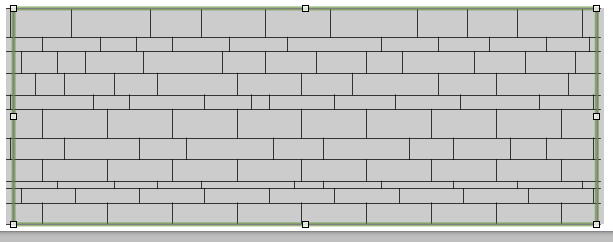
Okay. I redid my pattern smaller - since tiling is going to work! - but still getting a gap between horizontal tiles.
You can see the artboard is inside the bounds of the image so there shouldn’t be any white space on the sides. But I get:
Very weird.
Yes I have already asked about the rotating the image…but if didn’t think it hurt to try! You all have some interesting ways to get things done and not everyone does things the same. (Options are good)
Oh, sorry, I didn’t see this reply and have been busy! I did notice gaps can appear on screen depending on the zoom level. This should only be an on-screen bug though. Is that possibly the case here? Or is this an exported image?
No worries @DerekM. I saw the recent version upgrade and the teams have been very busy.
I have not printed out the pattern since what I see usually matches exactly with what is printed.
The way I usually do the exported pattern is by exporting to PDF then importing the image as the fill pattern. (side annoyance: having to run through the process - edit pattern, export pattern, refresh pattern import, test - repeatedly to try and prevent odd blank spaces where the tiling meets).
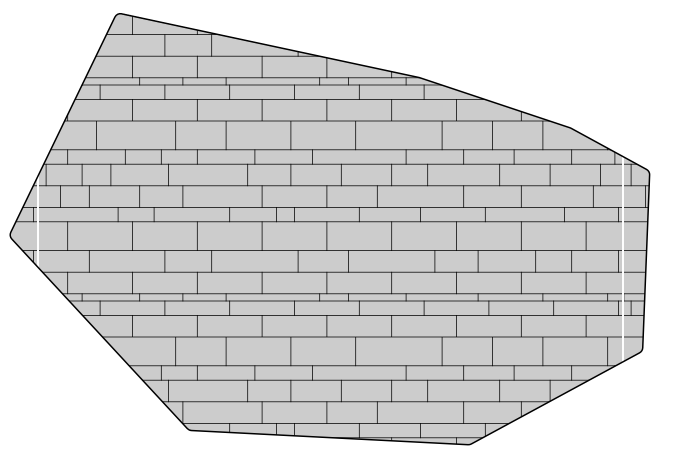
I am now only using that for smaller ‘swatches’ instead of the bedrock pattern I had previously built. For the bedrock, I am using a group which allows better control over rotation. Then I use two joined shapes (Subtract) to create a mask for extra pattern.
For the tiled pattern, it would be really helpful to have the options to better adjust space between tiles (so I can space the tiles closer or farther apart). Currently, you can only adjust the vertical and horizontal size of the tiled image.
Tile adjustment is a fair request and that should be adequate to fix your gaps as long as you’re using a transparent background on your images (which is possible with PDF). Otherwise the gap won’t go away because you have white/colored pixels overlapping the content you want.
You might have better luck using another app to do your cropping, such as Preview or an image editing app, if these gaps are actually part of your image. The advantage of using Preview, or I would assume any PDF editor, is it can crop the PDF without throwing away the content outside the crop. This should mean it’s impossible to introduce white space to the image itself.
If the gap is actually from the zoom rendering bug I mentioned, then adjusting the gap would make things worse if you exported your final result it since what you see on screen isn’t accurate.
I would rather use an SVG image or OG pattern fill object but not currently an option. Any time you get near raster, the file size starts to grow.
I hadn’t thought about using Preview to snip…
Now just thinking, would a image mask help? Testing… Maybe, but at the scale I am currently working, there is not fine enough control. I may blow image up a bit so I can test out some more.