I am trying to draw a flowchart and it’s much more difficult than it should be.
-
I want a palette where I can select from the flowchart objects. Constantly selecting the object tool, then clicking on the shape, and then drawing the object is too time consuming.
-
The objects do not connect properly. They are drawing the connections from the center of the object, not from the vertices, as is correct for a flowchart. I was able to select an object, go to the Properties tab, go to Connections, click Allow connections from line, and select on each vertex, but again, I have to do this for each object. Even with this selected, if you click on a vertex, it just resizes the object. Clicking on the line tool and then a vertex will create a line, but you have to go through this process each time. How do you make this the default?
-
After you finally draw the line, the geometry for the line is blank, meaning you can’t see a size for the line. Why doesn’t this show for the lines?
This all seems way too difficult. Is there some place I’m missing to easily draw flowcharts?
Thanks.
Randy Kaempen
Hi Randy,
-
It seems like you need a stencil, which is how most people drag out objects they have created to make a consistent flowchart. Check out the Stencils palette, and search for some existing stencils. Many users choose stencils over creating most of the objects in their document with the shape tool.
-
The default option for shapes is the “Route from objects center”, but you can turn that off in the Properties tab in the Connections Inspector when you have graphic(s) selected. It sounds like your best solution is to use magnets, which are in a dropdown also in the Connections Inspector in the Properties tab of the Inspector. You can set up where the magnets are so that you can control the routing precisely, and one of the options is “on each vertex” which seems like a good option to try for what you are envisioning. This is also where stencils come in handy. You set up the objects and how you want them to connect once, then reuse them over and over.
-
If a line connects 2 shapes, the connecting line moves with the graphics, so the line is dependent on the graphics it is connecting. The size of the line, and the line existing at all is controlled by where the objects are. If you delete either object, the connecting line ceases to exist too. As those objects move, the line will move with them. If you draw a line that isn’t connected to other objects, it will have geometry, because it isn’t defined by the objects it is connecting.
So yes! It sound like you are missing out on stencils, which would be helpful for your workflow. Take a look at the stencils palette, and if you have time I recommend taking the tutorial at https://support.omnigroup.com/documentation/omnigraffle/mac/7.0/en/diagramming-basics/.
It does take some time to get used to using OmniGraffle, because it supports so many workflows, but we have support humans available who are knowledgable and friendly. You can choose Contact Omni from the help menu & send us an email anytime. We are happy to help!
Thanks,
Lanette
Lanette,
Thanks for the info.
I found the Stencils palette. Its flowchart objects are good, but not exactly what I need. Is there a way for me to add my objects to the palette after I have set them the way I need? You say I can re-use the objects I can set up, but how? Where do I save them?
There is also a Stencils option on the Windows menu, but selecting it doesn’t do anything. What is it supposed to do?
Your tutorial was useful. I tried selecting Auto Layout, but it messed up my drawing. I am making a flowchart for a program, so it doesn’t match the format of an org chart. When I unchecked Auto Layout, it kept going back on. I chose Revert and made it never to may latest saved version, but it still showed Auto Layout checked. Shouldn’t reverting take all the settings back the the saved ones?
Since Auto layout won’t work with drawings, that’s why I’m saying I need to see the size of the lines I’m drawing between objects to connect them. I need them to be the same size so it looks consistent. I don’t see why you can’t show the size of a line that is connecting objects. It has a start point and an end point, so you could show those values. I understand making them non-enterable because they’re based on the objects, but I need to see the length of the lines.
Thanks.
Randy Kaempen
Yes! There are several ways. If there is a stencil you mostly like, but you just need to add to it, you can Option/Drag items in to add to it in the Stencils palette. You can create a new stencil by choosing Resource Browser from the File menu, then under the Gear Menu (Upper Left) choose New Stencil.
To make your own custom stencil from an existing document, you can create whatever shapes you like in OmniGraffle, then Export and choose OmniGraffle, and for Format type pick OmniGraffle Stencil. When you open it choose “Edit and Move” and that will put the stencil in the right place so that you can use the stencil from the Stencil’s palette. There are some practices that make stencils easier to use, like naming things in a way that makes sense to you, or adding metadata. We have more info at https://support.omnigroup.com/documentation/omnigraffle/mac/7.6/en/using-curating-and-creating-stencils/ which could help.
If you need to see the length of a line, you can add a variable to the line using the text tool of <%length%> which will show you the length on the line itself. There is an example you can drag out in the Variables stencil. You can also turn on Smart Guides or grids which will help to keep your spacing consistent. Hope this gives you a few options to try out.
Thanks,
Lanette
Layette,
Thanks again.
Is there a way to nudge the text inside an object around when ‘wrap to shape’ is selected? Sometimes, the way it draws it overlaps the lines and it would look better if the text could be moved up or down a few pixels. I have tried all the text position options and I can’t get it lined up correctly. Any ideas?
Randy Kaempen
Sure. Those are the Margin values in the Text Position inspector. Put in a higher number to increase the margins.
Lanette,
The margin values apply to both sides of the text. In this case, the text runs into the object at the top, but there is room at the bottom. I just need the ability to slide lower with respect to the object.
Randy Kaempen
Hi Randy,
I’m having trouble picturing what you are trying to accomplish. Can you post an example or a photo so I can take a look?
Thanks,
Lanette
Here’s the part I need to change.
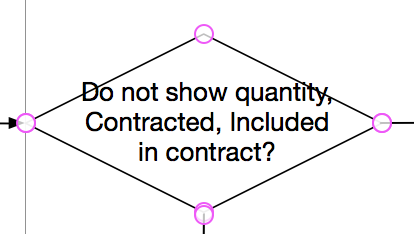
You can see if I could move the text down, it would fit better.
Randy Kaempen
Hi Randy,
Thank you for the example. I can see why you aren’t having success with the text settings, and you are doing everything correctly, but the text wrap you want isn’t possible. The ability to wrap to non-rectangular shapes is a common feature request, which is the root of the problem you are experiencing. The only options are to make the text smaller or the shape bigger in this situation. Sorry for the bad news. I will add your request that we allow wrapping to non-rectangular shapes. If you run into anything else that is stopping you, feel free to contact us from the Help menu, by picking Contact Omni.
Thanks,
Lanette
Simple Solution
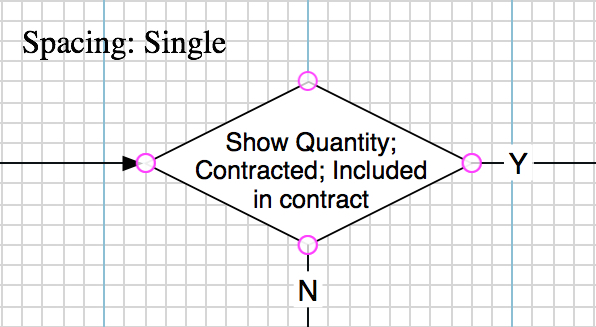
For that particular Shape and text content, Set the Text Position:
- on the vertical axis:
- use AlignToTop (not AlignToCentre)
- or AlignToBottom in other cases
- increase the Top/BottomMargin value
(The terms in the diagram should be positive, the arrows describe the negative and positive paths.)
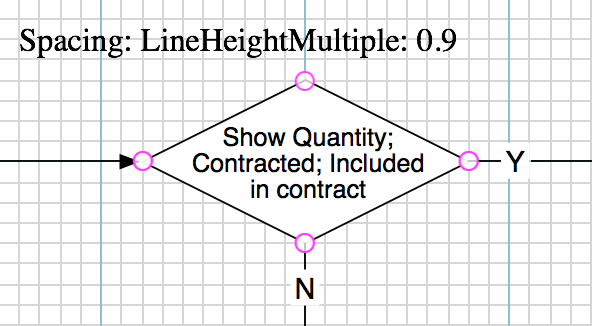
You can reduce the Spacing of the lines of text (or between the lines), via the Spacing DropDown (the options are quite extensive). Here I have changed the LineHeight to 90%:
Generic Solution
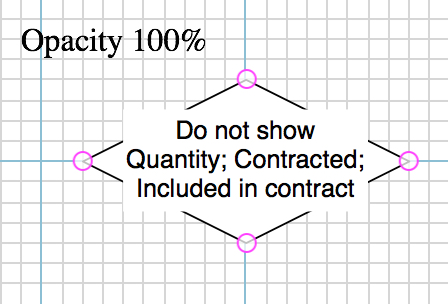
As the OmniGroup folks state, OmniGraffle does not handle text in non-rectangular Shapes very well. But it handles text in rectangular Shapes quite well. So the method is to use a rectangle for text, and to group it with the target Shape. This is a very useful element, that can be used to overcome difficulties in many instances, not only this scenario.
- Draw a rectangle
- As per your requirements for the text content:
- Size the text (font & size)
- Set the vertical & horizontal Alignment & Margins
- Size the rectangle
- Set the Fill to White, Opacity 100%
- Turn off the Stroke
- Turn off the Magnets
- Place the rectangle in front of the target Shape
- Group the two Shapes
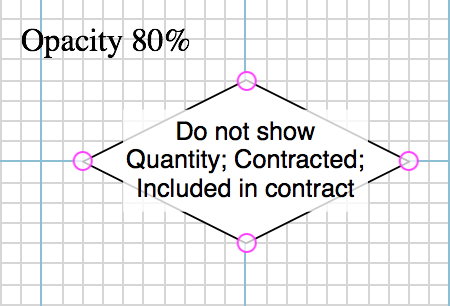
If you don’t like the total loss of the Stroke of the original Shape, and you would like it to show through a little, in the rectangle:
- Set the Fill to White, Opacity 80%
Cheers
1 Like
Thanks for the suggestions.
Knowing that it doesn’t wrap well to the shapes, I can always add carriage returns to make text fit the shape better.
In this case, it was frustrating, because if I could just nudge text down in relation to the object, it would have been fine.
Of course, the ultimate solution is for Omni Group to get the text wrap to work with other shapes. I’m sure they have that in the works.
Thanks again.
Randy Kaempen
1 Like