Perhaps this is fairly basic, but I don’t see a simple way to add equidistant tick marks to a line based on a scale? IOW, if I want to add 10 tick marks to a line I draw, I want them to, by scale, be equidistant apart (and add labels).
I would love such a feature but it is probably a custom line type and OG does not yet have those. I hand draw my ‘ticked’ features and then group the small lines with the ‘main’ line. Annoying but looks pretty sharp.
Trick I that works for me is changing from a straight line to a dashed or dotted line so I can ensure my spacing is consistant.
One thing that may help is using grid lines, even if it is not to the scale you want. You can draw your main line, then add ticks on the grid (snap to grid). You can then resize your line (maintaining aspect ratio or not, probably not would work better) to the length necessary.
Rather than relying on grids or dashes I create the number of tick marks I want to have, align them vertically with the line, and then “distribute” them evenly horizontally. (It found together with the alignment tools)
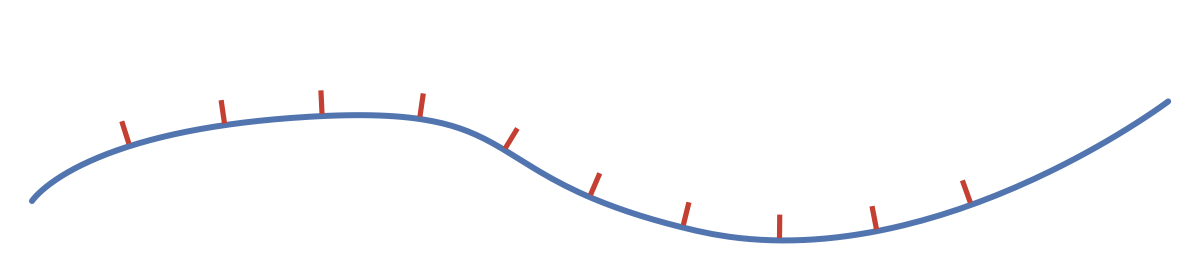
Just a completely different approach for tick marks (but still missing labeling):
Write a sequence of I…I…I…I (as many as needed capital I with a certain number of blanks in between) in your favourite text editor and copy this string.
Select the line you want to add the tick marks with the text tool and paste the text. The line is not restricted to a straight line.
Set the type of line label to “follow path” and set the background of the label to “none”. Select a font where the capital I is just a line (eg. Arial), set text size and color as needed.
@t_j I really like this idea. I have been drawing lines and adding tick marks then resizing the ticks to be the same (or pretty close to the same). This appears SO much easier, esp for curved lines. I am in the process of editting some of my drawing to add ticked lines (to either solid or dashed lines) and will give this a try.
Guessing I can change the font size and kerning to adjust spacing, too.
[Later]
Okay, I have tried this a few times and I cannot get the text to flow on the shape, it keeps flowing around the text box but not the line.
I know I have done this before but can’t figure out why not working now (I really need this! ;-)
Just a guess because you wrote “… to flow on the shape”: With shapes the “size and position” panel gives not the option to follow path. It only works if you draw a line with the line tool. Then the “size and position” panel gives you the option to select follow path (the last selection box in the panel).
I know I am missing something so let me go through the steps I understood and am doing:
I draw a line with the Line Tool and put a couple nodes on it;
I select the text tool and click on the line;
that brings up a text box that show “Line Label”
I add the text "I I I I I I I I " (starting point)
I select the newly created text box
change Fill to “No Fill”
Under Text Position I left it “Middle Align”, “Center” (both grey out in next step anyway)
Now I select “Text follow Shape’s Path”
What I see on the screen is the text jump to the top of the text box. I can have the text scroll around the box but it doesn’t stay on the line.
I missed something but don’t know what.
I can get the text to flow on shapes created using the Shape Tool.
ARGH!
The key is using the “Geometry” inspector and changing the “Label orientation in relation to line” to “Follows Path”. This is different than the “Text Position” inspector’s text position and using “Text follows Shape’s path”