I’m building a large project outline and wanted to export it to graffle. That’s easy enough. However, when I do, besides all of the simple lines of information, every entry on the flow chart has the word “unchecked” above it as a second line of text. effectively adding a word if checked or unchecked based on the status box from Outline… which I’m not using. This is visually cluttering, and the instructional example of doing this, doesn’t seem to bring this extra text along. Is there a way to turn it off?
In Outline, before the export, try removing the column that is checked/unchecked.
If you are using recent builds of each, one option would be to:
- do a vanilla import through omniJS (choosing to import OmniOutliner topic texts only),
- use Format > Choose Diagram Style in Omnigraffle
Sample code test with OG 7.5 and OO 5.2 (Test)
(For a simple test, make sure that you have your outline in the front OmniOutliner document, the copy the whole code, and then paste and enter in the OmniGraffle omniJS console OmniGraffle > Automation > Show Console)
(() => {
    'use strict';

    // Rob Trew 2017

    // OMNIGRAFFLE 7.5 - OMNIJS CODE TO:
    // 1. READ AN OMNIOUTLINER OUTLINE THRU URL.tellScript(s).call(f(v))
    // 2. CREATE A NESTED TREE DIAGRAM FROM THE OUTLINE

    // OMNI-OUTLINER OUTLINE-READING FUNCTION --------------------------------

    // docTextNests :: OO () ->
    //      [TextNest :: {text :: String, nest :: TextNest}]
    const docTextNests = () => {
        const tn = x => ({
            text: x.topic,
            nest: x.children.map(tn)
        });
        return JSON.stringify(document.outline.rootItem.children.map(tn));
    };

    // OMNIGRAFFLE DIAGRAM-BUILDING FUNCTION ---------------------------------

    // Blank Canvas -> Dictionary with text and list of child dictionaries
    //                   -> Root shape of new diagram
    // nestedDiagram :: OG Canvas ->
    //          TextNest :: {text :: String, nest :: TextNest} -> OG Shape
    const nestedDiagram = (cnv, dctNode) => {
        const shp = cnv.newShape();
        return (
            // Effect
            shp.geometry = new Rect(0, 0, 120, 120),
            shp.text = dctNode.text || '',
            dctNode.nest.map(x => {
                const child = nestedDiagram(cnv, x);
                return (cnv.connect(shp, child), child);
            }),
            // Value
            shp
        );
    };

    // EVALUATING OMNI-OUTLINER CODE (FROM INSIDE OMNIGRAFFLE) ---------------
    // TO A (STRINGIFIED) NEST OF TEXTS
    URL.tellScript('omnioutliner', '(' + docTextNests + ')()')
        .call(strJSON => {
            // BUILDING A TREE DIAGRAM FROM THE NEST OF TEXTS ----------------
            // Canvas prepared,
            const cnv = addCanvas();
            document.windows[0].selection.view.canvas = cnv;
            cnv.layoutInfo.automaticLayout = true;

            // and diagram built.
            JSON.parse(strJSON)
                .map(x => nestedDiagram(cnv, x));
        });
})();
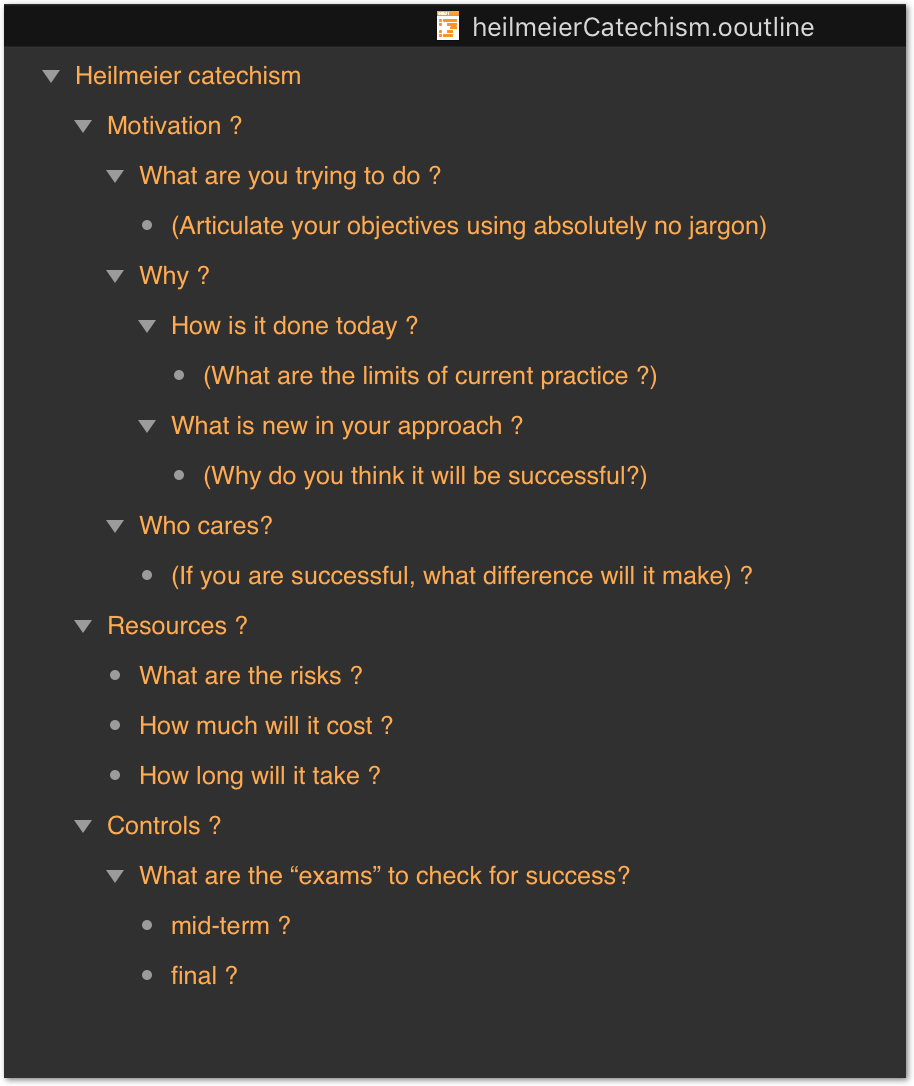
Example of raw unformatted output:

from:
Or, a JavaScript for Automation version which can be run from Script Editor, etc, rather than pasted into the Automation Console of OmniGraffle 7.5:
- Copy code in its entirety (check for code hidden by scrolling)
- Paste into Script Editor
- Set language tab at top left of Script Editor to JavaScript
- Check that you have an outline open as the front document in a recent (Test) build of OmniOutliner
- Run
(() => {
    'use strict';

    // Code for evaluation in OmniGraffle 7.5 (v181.4 r297378)
    // Assuming an outline open as front doc of
    // OmniOutliner 5.2 test (v184.1 r299350)
    const oo2og = () => {

        // Rob Trew 2017

        // OMNIGRAFFLE 7.5 - OMNIJS CODE TO:
        // 1. READ AN OMNIOUTLINER OUTLINE THRU URL.tellScript(s).call(f(v))
        // 2. CREATE A NESTED TREE DIAGRAM FROM THE OUTLINE

        // OMNI-OUTLINER OUTLINE-READING FUNCTION --------------------------------

        // docTextNests :: OO () ->
        //      [TextNest :: {text :: String, nest :: TextNest}]
        const docTextNests = () => {
            const tn = x => ({
                text: x.topic,
                nest: x.children.map(tn)
            });
            return JSON.stringify(document.outline.rootItem.children.map(tn));
        };

        // OMNIGRAFFLE DIAGRAM-BUILDING FUNCTION ---------------------------------

        // Blank Canvas -> Dictionary with text and list of child dictionaries
        //                   -> Root shape of new diagram
        // nestedDiagram :: OG Canvas ->
        //          TextNest :: {text :: String, nest :: TextNest} -> OG Shape
        const nestedDiagram = (cnv, dctNode) => {
            const shp = cnv.newShape();
            return (
                // Effect
                shp.geometry = new Rect(0, 0, 120, 120),
                shp.text = dctNode.text || '',
                dctNode.nest.map(x => {
                    const child = nestedDiagram(cnv, x);
                    return (cnv.connect(shp, child), child);
                }),
                // Value
                shp
            );
        };

        // EVALUATING OMNI-OUTLINER CODE (FROM INSIDE OMNIGRAFFLE) ---------------
        // TO A (STRINGIFIED) NEST OF TEXTS
        URL.tellScript('omnioutliner', '(' + docTextNests + ')()')
            .call(strJSON => {
                // BUILDING A TREE DIAGRAM FROM THE NEST OF TEXTS ----------------
                // Canvas prepared,
                const cnv = addCanvas();
                document.windows[0].selection.view.canvas = cnv;
                cnv.layoutInfo.automaticLayout = true;

                // and diagram built.
                JSON.parse(strJSON)
                    .map(x => nestedDiagram(cnv, x));
            });
    };

    const
        a = Application.currentApplication(),
        sa = (a.includeStandardAdditions = true, a),
        strURL = 'omnigraffle:///omnijs-run?script=' + encodeURIComponent(
            // Function coerced to string by concatenation
            '(' + oo2og + ')()'
        );

    return (
        sa.openLocation(strURL),
        Application('OmniGraffle')
        .activate(),
        strURL
    );
})();
As above (for JXA – Script Editor JavaScript mode), but compacted (in ES5 idiom) for a shorter URL.
(Steps as in previous post)
(function() {
  var c = Application.currentApplication();
  c = (c.includeStandardAdditions = !0, c);
  var e = "omnigraffle:///omnijs-run?script=" + encodeURIComponent("(" + function() {
    var c = function(b, a) {
      var d = b.newShape();
      return d.geometry = new Rect(0, 0, 120, 120), d.text = a.text || "", a.nest.map(function(a) {
        a = c(b, a);
        return b.connect(d, a), a;
      }), d;
    };
    URL.tellScript("omnioutliner", "(" + function() {
      var b = function(a) {
        return {text:a.topic, nest:a.children.map(b)};
      };
      return JSON.stringify(document.outline.rootItem.children.map(b));
    } + ")()").call(function(b) {
      var a = addCanvas();
      document.windows[0].selection.view.canvas = a;
      a.layoutInfo.automaticLayout = !0;
      JSON.parse(b).map(function(b) {
        return c(a, b);
      });
    });
  } + ")()");
  return c.openLocation(e), Application("OmniGraffle").activate(), e;
})();
And finally, simply as a URL that can either be run from Safari (not Chrome, etc),
or invoked with the JXA standard additions .openLocation() method:
(() => {
    'use strict';

    const
        a = Application.currentApplication(),
        sa = (a.includeStandardAdditions = true, a);

    sa.openLocation('omnigraffle:///omnijs-run?script=(function%20()%7Bvar%20c%3Dfunction(b%2Ca)%7Bvar%20d%3Db.newShape()%3Breturn%20d.geometry%3Dnew%20Rect(0%2C0%2C120%2C120)%2Cd.text%3Da.text%7C%7C%22%22%2Ca.nest.map(function(a)%7Ba%3Dc(b%2Ca)%3Breturn%20b.connect(d%2Ca)%2Ca%7D)%2Cd%7D%3BURL.tellScript(%22omnioutliner%22%2C%22(%22%2Bfunction()%7Bvar%20b%3Dfunction(a)%7Breturn%7Btext%3Aa.topic%2Cnest%3Aa.children.map(b)%7D%7D%3Breturn%20JSON.stringify(document.outline.rootItem.children.map(b))%7D%2B%22)()%22).call(function(b)%7Bvar%20a%3D%0AaddCanvas()%3Bdocument.windows%5B0%5D.selection.view.canvas%3Da%3Ba.layoutInfo.automaticLayout%3D!0%3BJSON.parse(b).map(function(b)%7Breturn%20c(a%2Cb)%7D)%7D)%7D)()');

})();
URL on its own:
omnigraffle:///omnijs-run?script=(function%20()%7Bvar%20c%3Dfunction(b%2Ca)%7Bvar%20d%3Db.newShape()%3Breturn%20d.geometry%3Dnew%20Rect(0%2C0%2C120%2C120)%2Cd.text%3Da.text%7C%7C%22%22%2Ca.nest.map(function(a)%7Ba%3Dc(b%2Ca)%3Breturn%20b.connect(d%2Ca)%2Ca%7D)%2Cd%7D%3BURL.tellScript(%22omnioutliner%22%2C%22(%22%2Bfunction()%7Bvar%20b%3Dfunction(a)%7Breturn%7Btext%3Aa.topic%2Cnest%3Aa.children.map(b)%7D%7D%3Breturn%20JSON.stringify(document.outline.rootItem.children.map(b))%7D%2B%22)()%22).call(function(b)%7Bvar%20a%3D%0AaddCanvas()%3Bdocument.windows%5B0%5D.selection.view.canvas%3Da%3Ba.layoutInfo.automaticLayout%3D!0%3BJSON.parse(b).map(function(b)%7Breturn%20c(a%2Cb)%7D)%7D)%7D)()
So the other trick that just worked was to group select all the items and under the “Edit” menu set the “Set Status” to “Calculated”. That seemed to do the trick. Except it was tricky as to how you select the items. You specifically have to make sure taht under the “Document” properties that the status is set to visible, otherwise you can’t edit it. Setting to Checked, Unchecked or None, will show up in the OmniGraffle. But “calculated” won’t.
Side note, the “status” isn’t a column that can be deleted. It seems to be embedded in the item itself. Like a note or even a color or formatting setting.
1 Like
