Shape subtraction rotates image back to original angle

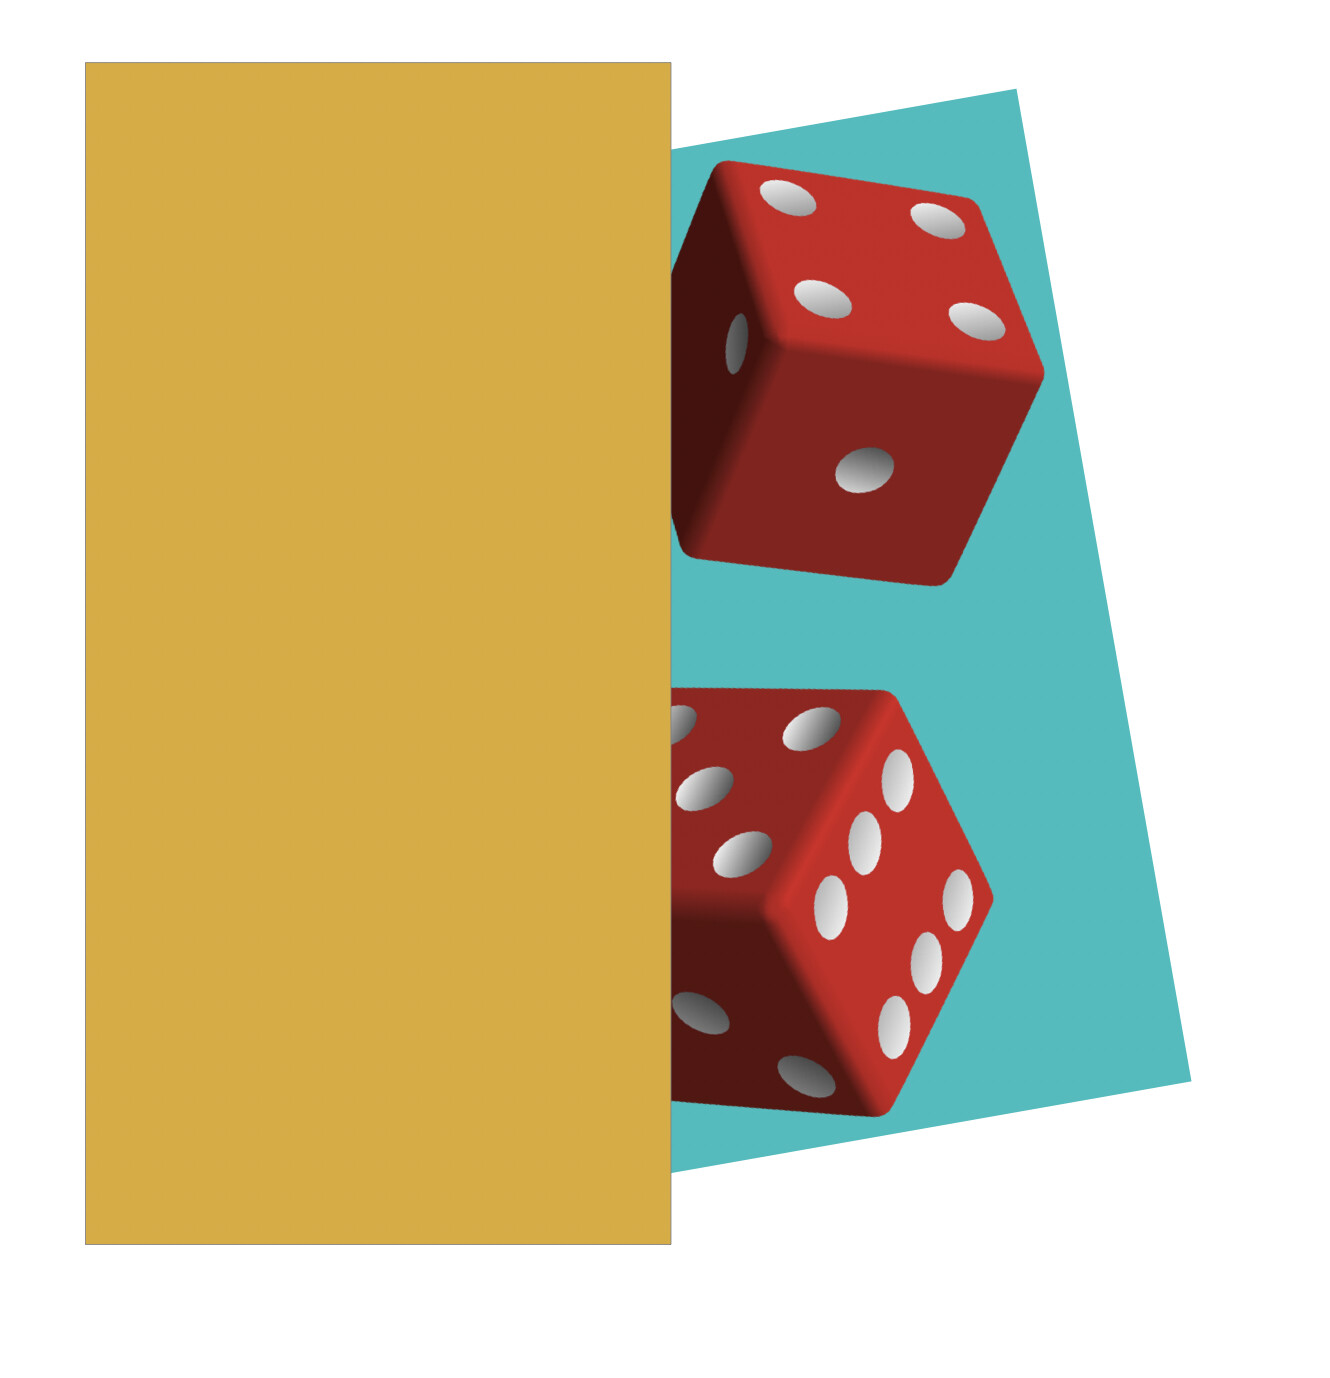
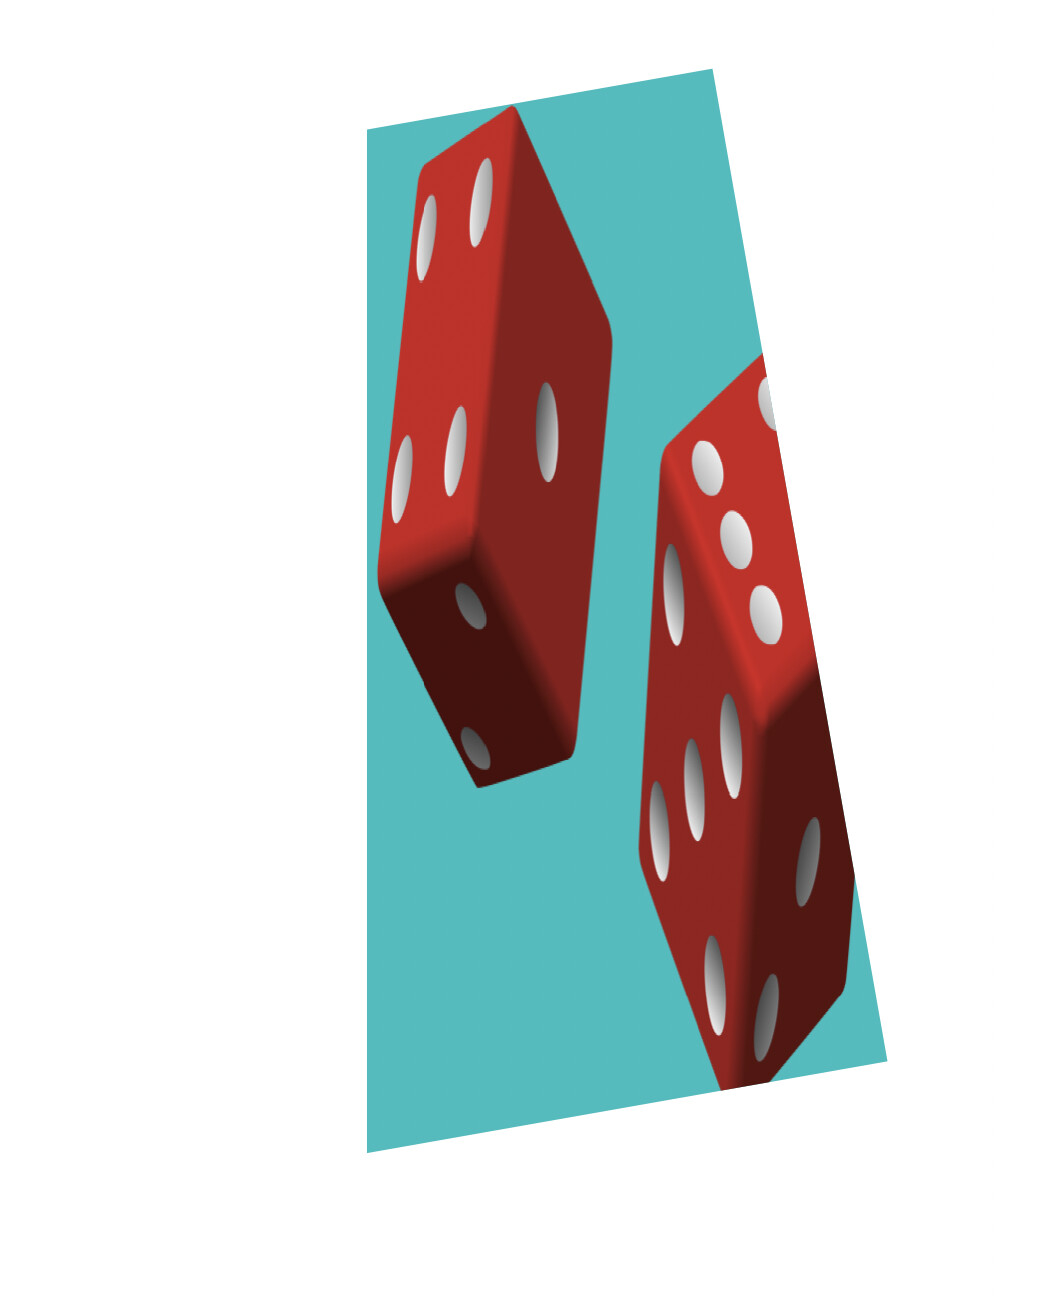
Hello, I am trying to substract two shapes. The subtraction results in the correct shape but the image (png file) inside the resulting shape is wrong, it’s rotated to its original position and it seems part of the “subtracting shape” is overlaid.

Shape A (“subtracting shape”) is a simple square. “Subtracted shape” is a png, rotated to 90.5° previously.

Is this expected? Anyone else with this issue?

Can you post a couple of screen shots to help explain?

Aside: Maybe you could accomplish what you want using a mask instead?

Here before the subtraction:

after subtraction:

For images (PNG; etc), OG:

  • the subtraction subtracts the <subtract_shape> area from the <target_shape>
  • the image remains whole in the <target_shape>
    which means the image is now “squeezed” or StretchToFit.

1

After the subtraction, in the image shape, fiddle with the image settings:

  • Natural <-- probably what you want
  • Stretch to Fit <–current
  • Tiled

Then set scale & position-in-shape, to get what you want.

I have gotten into the habit of using only Natural, to avoid a raft of fiddly issues (not this particular issue but many similar).

2

If that does not work, you need to use a Shape as a mask over the image.

  • duplicate the image Shape
  • place it over the first image, exactly
  • remove the image
  • set the Fill (probably to your background colour) and Stroke (probably NoStroke)

Cheers

1 Like

It is odd the image flips. I have not seen this but don’t often use this feature.

Not sure what you want at the end but aside from what GraffleGuru said, you could put a white shape ‘in front’ of the image. To keep things ordered, I would then group them.

That is called a mask.

Next, instead of white, Fill it with the background colour, to “hide” it. At least the part you want to mask.

Cheers

True it does mask the image behind it but it is different the the image mask you can apply via the Inspector.

I thought his background color was white.

Can change the “Stroke” setting to “No Stroke” as well. Sometimes easier than setting a Fill Color.

“natural” doesn’t help unfortunately.

So I guess using a shape as a mask is the only solution. I wonder if it’s not a bug, the fact the image’s rotation “resets” after the subtraction… The rotation applied before the subtraction should stay.

It’s reproducible with any image, if you want to try:

  1. copy image into canvas
  2. rotate it to -80 degrees for example
  3. subtract another shape from it

Yes, that is a bug. Report it.

(I did not mean that it was not a bug, I meant to give you a work-around that might work for you.)

Cheers

Of course. One is a manual mask, in which you have full control, the other is the masking that can be performed on a Shape via OG Inspector. The name is the same because the function is the same.

I don’t think the mask-via-OG will work in @hobbes’s case.

Cheers

A work around with shape masks (and assuming you cannot easily mask the not rotated image):

  • rotate the image as desired and memorise the angle
  • place the shape to use as mask over the image and group image and mask
  • rotate the group back (- angle) and ungroup
  • use the mask command in the shape inspector to subtract the mask from the image
  • rotate the image by angle
2 Likes